
User Management
This page explains how administrators create and maintain Kuboard user accounts, assign permissions to users, and handle day-to-day operations such as enable/disable, lock/unlock, password reset, and deletion.
Permissions are conveyed level by level through User → User Group → Role: assigning permissions to a user is in fact "adding the user to a user group that already has roles bound to it". See User Groups and Roles and Permissions for the concepts.
Opening the User List
- After logging in, go to System Administration → Users and Roles → Users.
- The top-left of the page is the Source dropdown, showing Built-in user repository by default; once external user repositories are enabled, you can also switch to Webhook user repository and OIDC user repository (see Webhook User Repository and OIDC Single Sign-On for how to connect them).
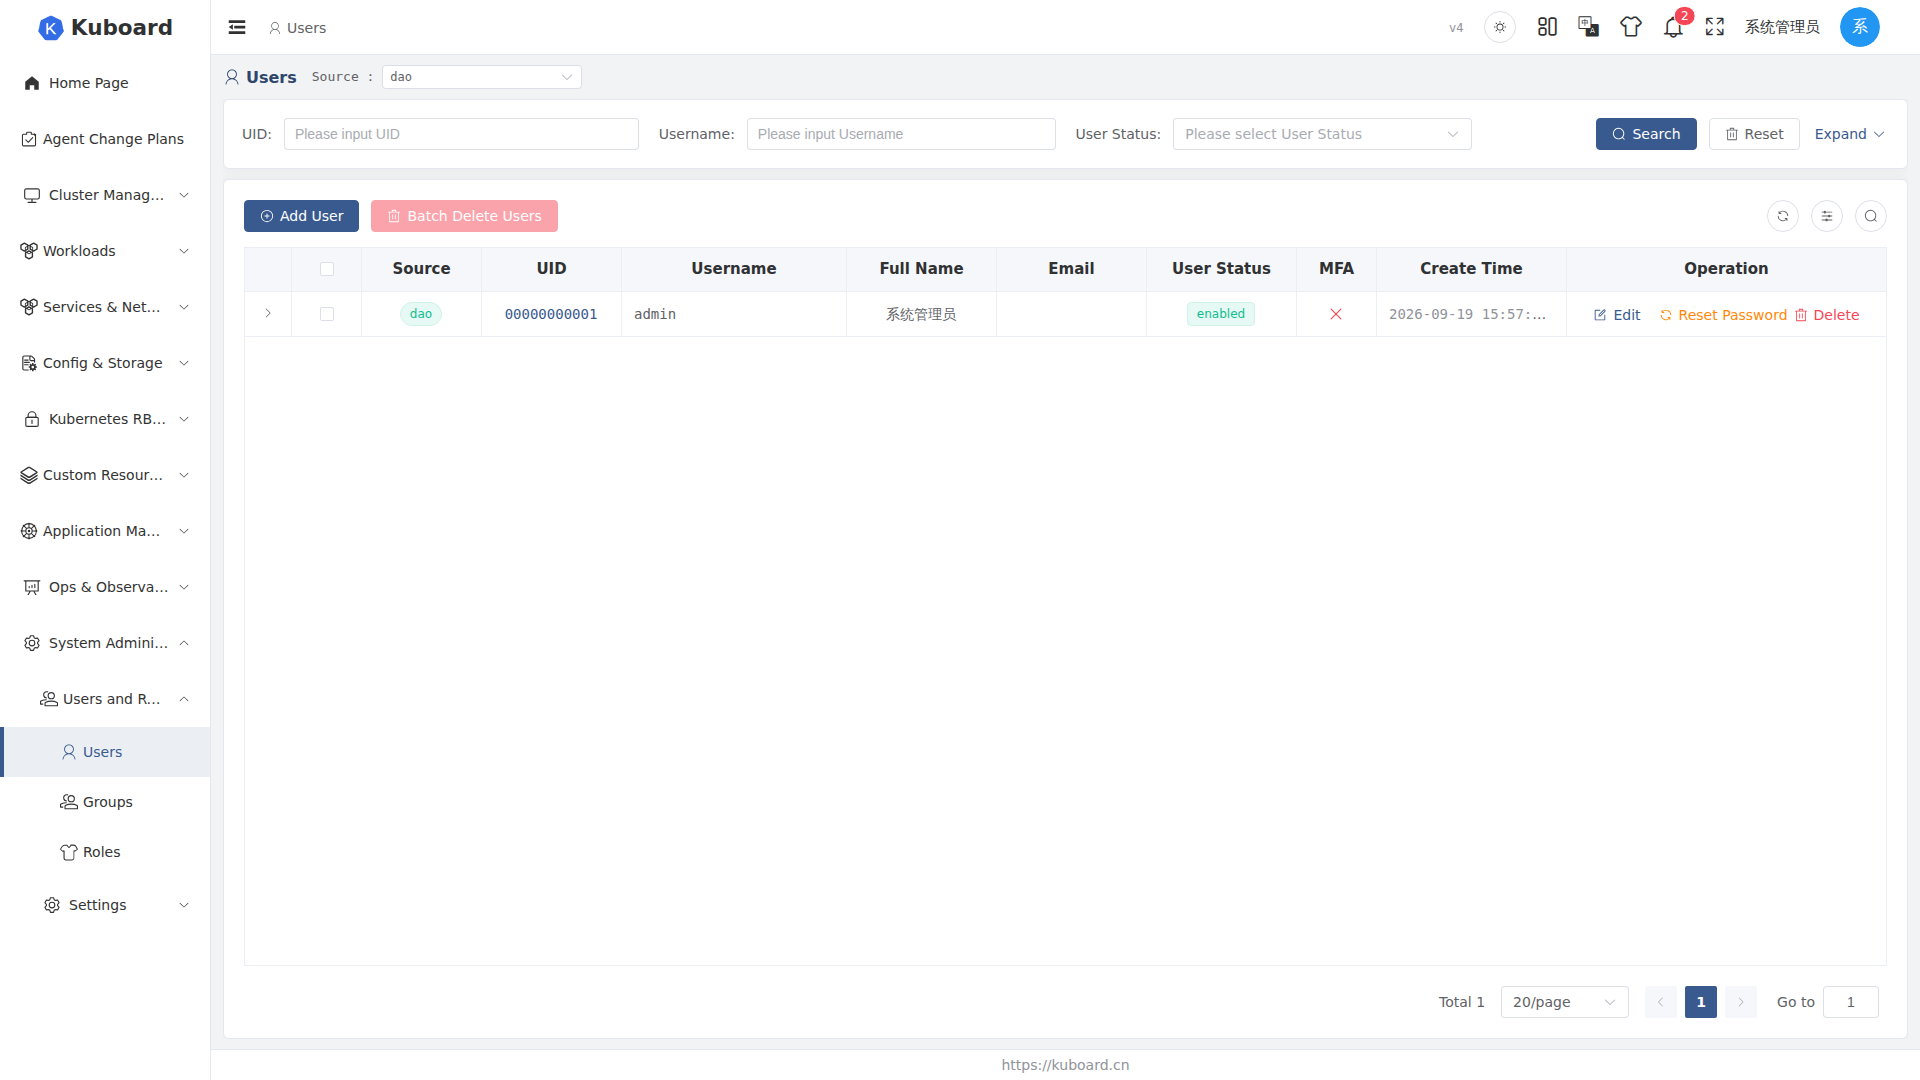
Main columns of the list: Username (searchable; users who have never logged in show a "Not Logged In" tag), Full Name, Email, User Status (filterable by status), MFA binding status, and Expiry Date; click the expand arrow at the start of a row to see the user's account and security information.
Creating a User
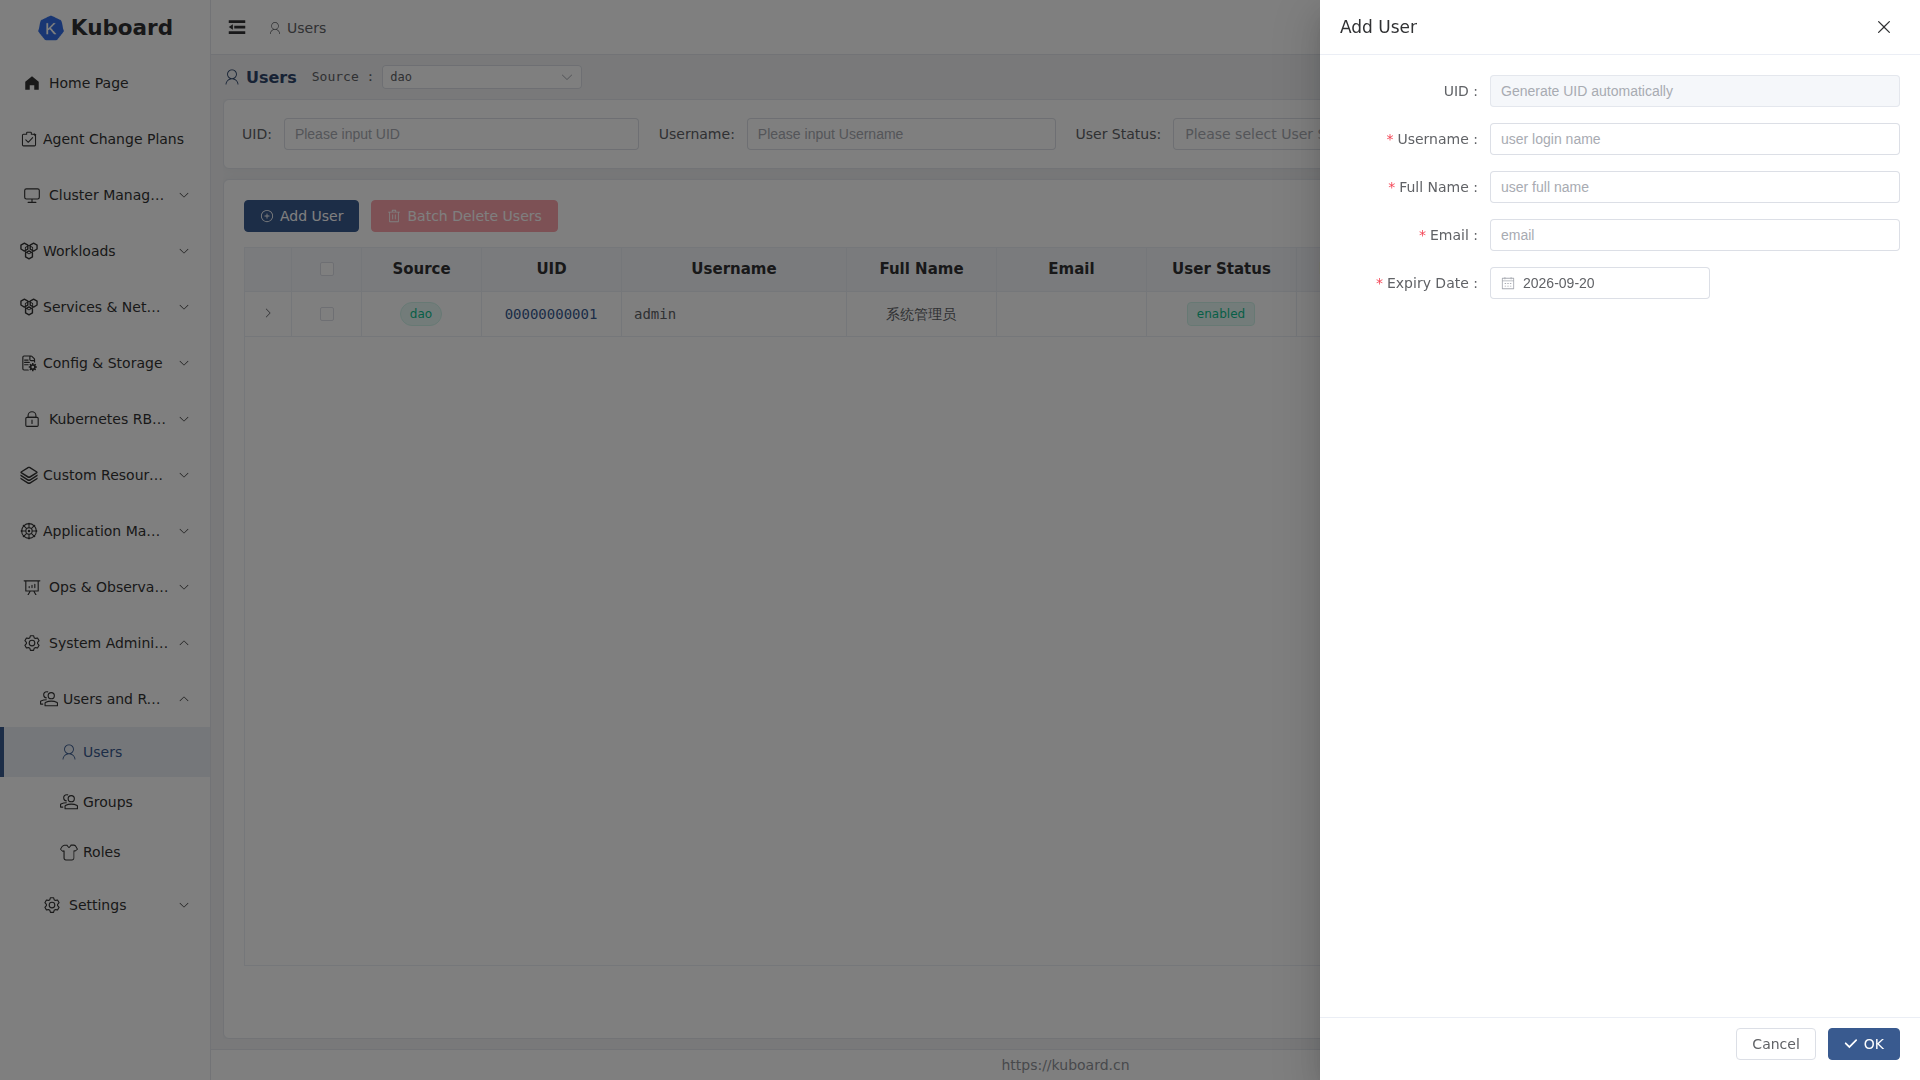
- Click Add User on the user list page.
- Fill in the drawer form:
| Field | Description |
|---|---|
| Username | Must start and end with a letter; may contain letters, digits, -, _, .; length no less than 3; cannot be modified after creation |
| Full Name | Display name, e.g. "Zhang San" |
| A valid email format | |
| Expiry Date | The account's valid-until date; once it expires, the user cannot log in |
The ID is generated automatically by the system; no need to fill it in. Click Confirm, and the user is created and you are automatically taken to that user's detail page.
Initial Password
Creating a user does not require setting a password. New users log in with the initial password Kuboard123 and must change it within 3 days by default (adjustable in the system configuration); see Password policy and changing your password.
User Detail and Assigning Roles
Click a user in the list to enter the detail page (navigated there automatically after creation succeeds). Tabs on the detail page:
- Bounded Groups: the user groups this user has joined and their binding expiry dates.
- Has Access Privileges: displays in real time all the permissions the user currently has and their sources; MFA: view/reset the user's MFA binding, shown only when MFA is globally enabled.
To assign roles to a user (join user groups):
- Open the detail page and switch to the Bounded Groups tab.
- Click Add User-Group Binding, select one or more user groups, and specify the binding validity period.
- Click Confirm. The user immediately gets all the permissions of the roles bound to these user groups; you can verify them on the Has Access Privileges tab.
TIP
If a user group has no roles bound yet, joining it brings no permissions — first confirm the group-role bindings on the User Groups page.
Managing Users
| Operation | How to do it | Description |
|---|---|---|
| Enable / Disable | Click Edit in the list's Operation column or on the detail page, toggle the User Status switch, then click Confirm | Once disabled, the user immediately cannot log in; the account and its bindings are retained |
| Unlock | When the account is locked due to too many consecutive wrong passwords, click Unlock and confirm | The attempt counter is reset to zero and normal login is restored |
| Reset Password | Click Reset Password and confirm | The password is reset to Kuboard123; the old password becomes invalid immediately; must be changed within 3 days by default |
| Reset MFA | When the user's MFA can no longer be verified, click Reset MFA | Clears the MFA binding; the user re-binds at the next login; see MFA multi-factor authentication |
| Delete | Single: click the delete button in the list's Operation column; batch: check multiple rows and click Batch Delete Users | Cannot be undone; also clears the user group bindings and access key records |
WARNING
For system built-in accounts whose usernames start with 000000, the status and expiry date cannot be modified, and they cannot be deleted.
WARNING
Deleting a user is a permanent operation: the account, password, and all authorization relationships are lost. It is recommended to use Disable instead of deletion first, and clean up only after confirming there is no impact.
User Source Differences
Users from different sources support different operations on this page:
| Source | Account password | What administrators can do on this page |
|---|---|---|
| Built-in user repository | Password stored in Kuboard | Create, edit, enable/disable, unlock, reset password, delete, bind user groups, reset MFA |
| Webhook user repository | Password validated by the external service; not stored locally | View, bind user groups, reset MFA, delete (clears only the local record; recreated on the next sync) |
| OIDC user repository | No password; authenticated by the identity provider (IdP) | View, delete (clears only the local record), pre-create placeholder users by email |
TIP
Switching the Source dropdown only switches the account system displayed in the list; it does not convert users from one source to another. Accounts from different sources with the same name are independent records.
API Documentation
The APIs involved in this section are described in the "Users and Roles" group of the Swagger UI.