
Connect AI Agents via Kuboard MCP
This page explains how to connect AI agents to Kuboard over MCP so they can query and operate your Kubernetes clusters directly, and how Kuboard approves any write operations an agent performs.
Supported agent clients: Claude Desktop, Cursor, Windsurf, Zed, VS Code, Trae, Cline, Continue, opencode, Claude Code, Goose, OpenClaw, Hermes Agent and more.
What MCP Provides
| Category | Capabilities |
|---|---|
| Cluster management | Query the cluster list, cluster details, cluster versions, node status |
| Workloads | Query Deployments, StatefulSets, DaemonSets, Pods; restart, update images, scale, rollback |
| Resource management | Query ConfigMaps, Secrets, Services, Ingresses, PVCs, ServiceAccounts, NetworkPolicies and more |
| Node operations | Pod eviction, node drain |
| Custom resources | Query CRDs and custom resource instances |
| Event monitoring | Query cluster / namespace events |
| Metrics | Query CPU, memory, network and other metrics via Prometheus |
| Agent change approval | Every write operation (modify, delete, restart, etc.) is executed only after you approve it in the Kuboard UI |
Prerequisites
- A running Kuboard V4 (v4.1.0+)
- An MCP-capable agent client installed (e.g. opencode)
Configuration Steps (using opencode)
1. Enable the MCP Server
Go to System Settings → MCP Server, turn on the MCP Server master switch and save → the settings page shows rate limit, CORS, Prometheus and other options.
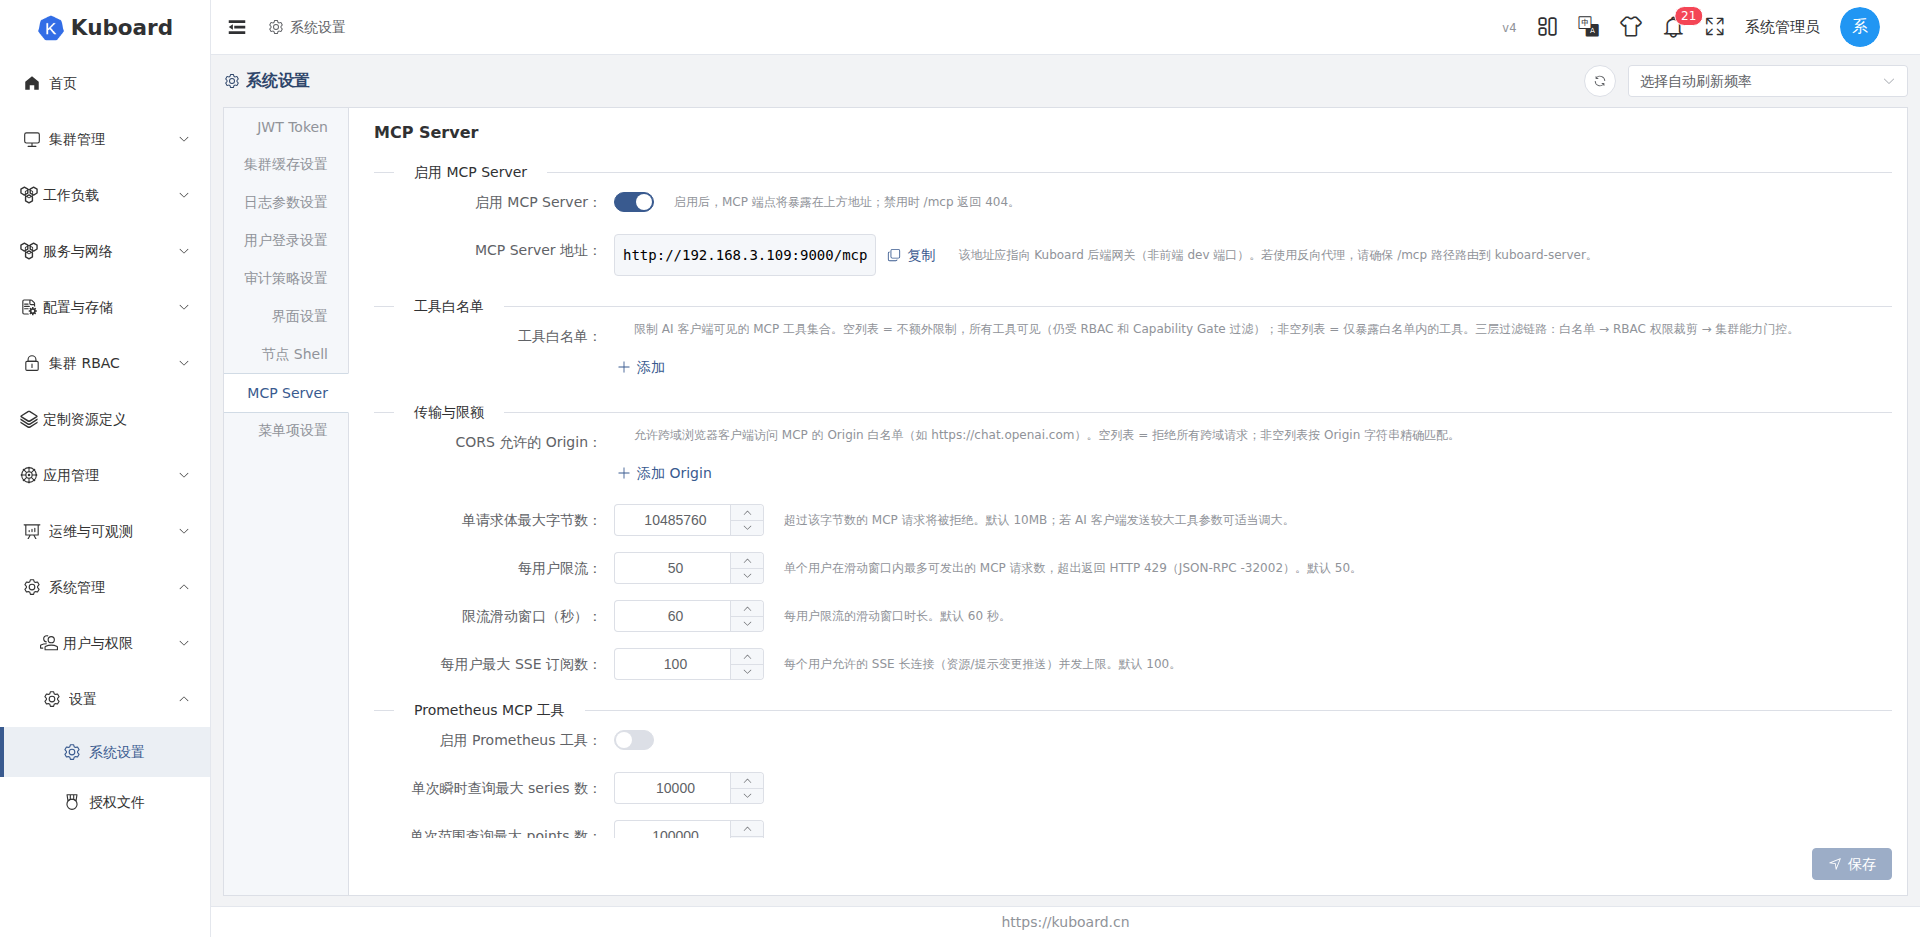
What else can you do on the settings page
- Adjust the per-user access rate limit (default 50 requests per minute)
- Configure allowed cross-origin sources (CORS)
- Configure the Prometheus data source (for the metrics query tools)
2. Get the MCP Configuration
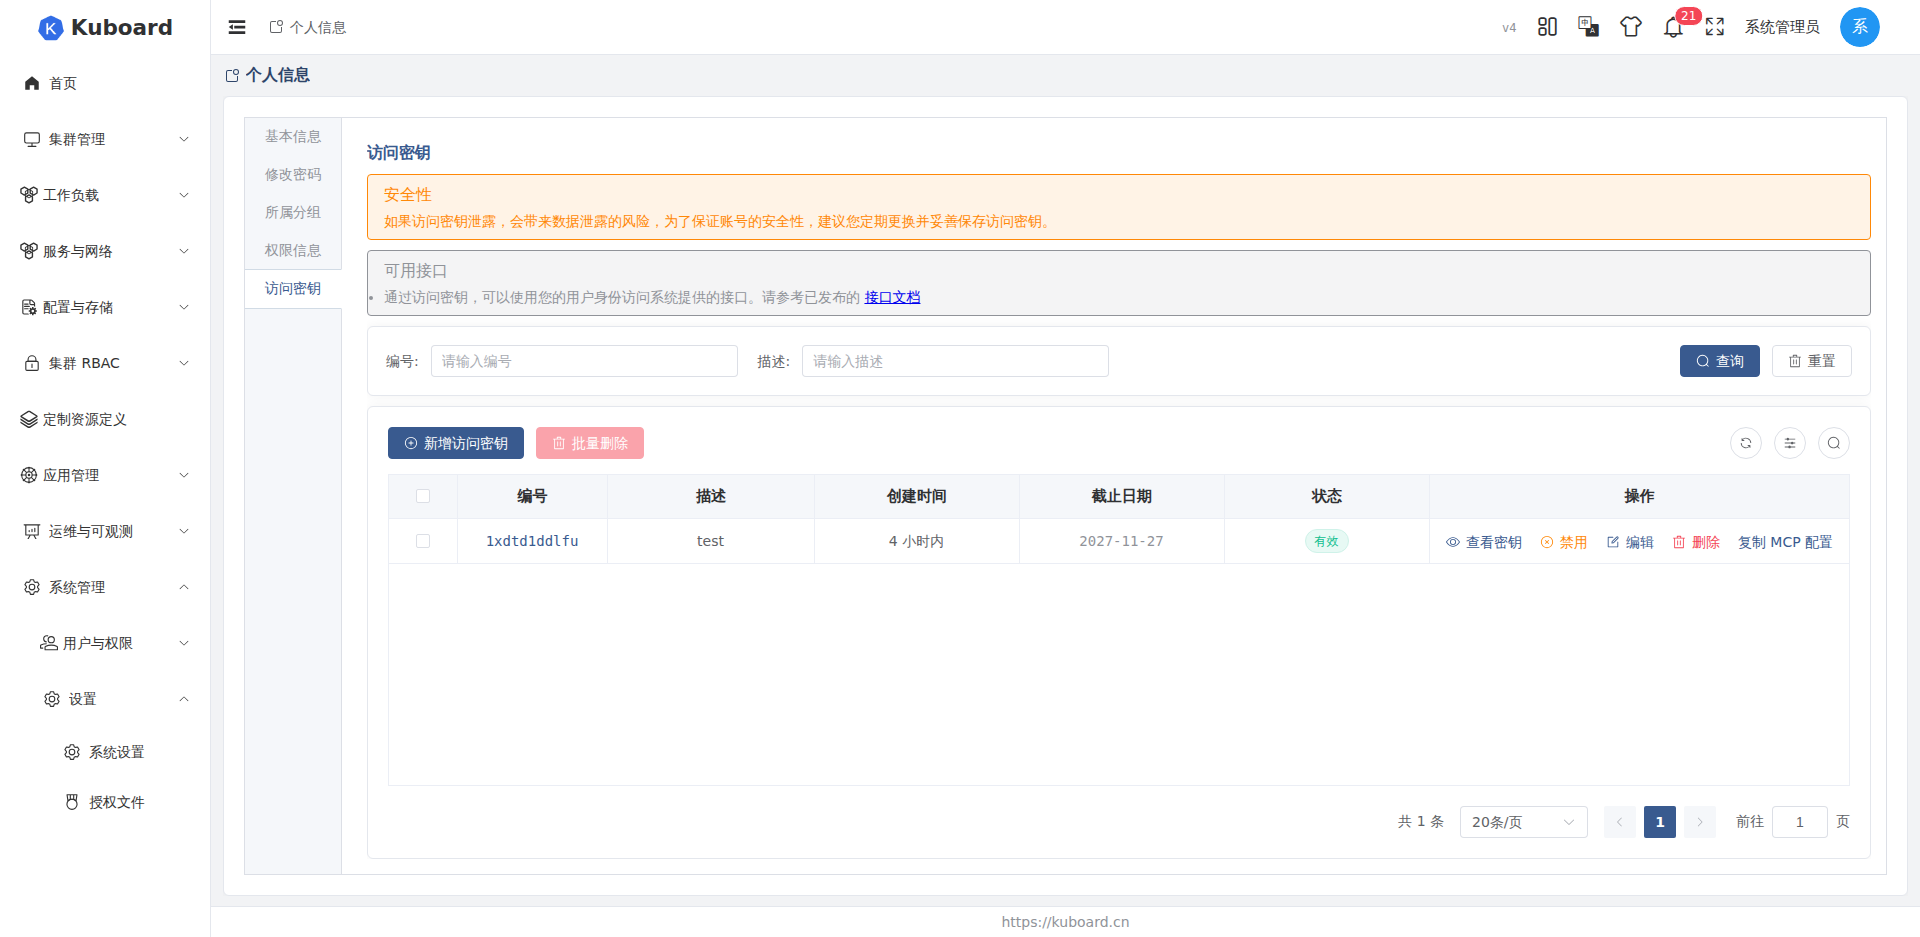
In the top-right user menu, click Access Keys → New Access Key to create a key → a new entry appears in the key list; click Copy MCP Configuration.
In the dialog, select opencode as the agent and click Copy → the MCP configuration snippet is now in your clipboard.
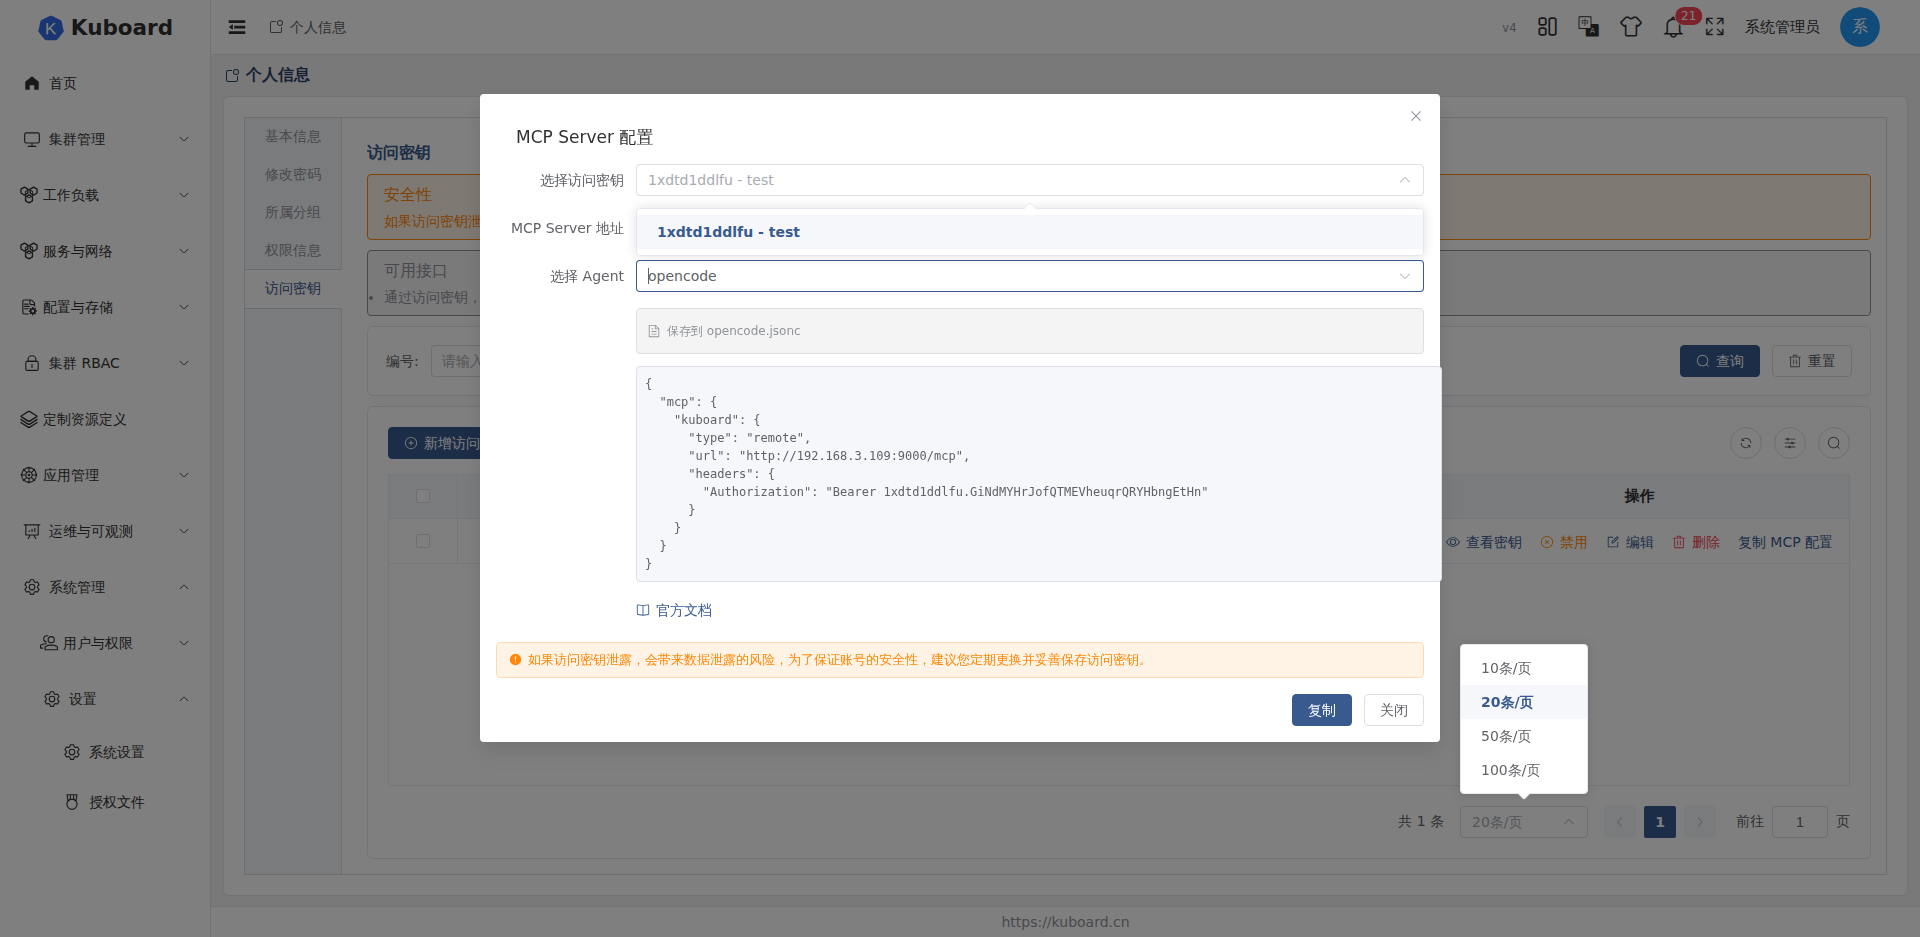
3. Configure opencode
Type the following prompt into opencode:
Set up the following MCP server configuration
<paste the copied configuration snippet here>
→ opencode automatically writes the configuration into the mcp field of opencode.json.
4. Verify the Connection
Restart opencode and type:
Use kuboard mcp to query which clusters and workloads are available→ opencode calls the Kuboard MCP tools and returns the cluster and workload information.
Agent Change Approval
To keep agents from misoperating or overstepping, Kuboard enforces mandatory approval for all write operations by default — an agent can only submit a change plan, and the cluster is actually modified only after you confirm it.
Disabling mandatory approval
You can turn off the "Force agent change approval" switch in the MCP Server settings, but this is not recommended for production environments.
How It Works
When you ask an agent to perform a modifying operation (e.g. "scale this Deployment to 5 replicas", "upgrade the image to v2", "delete this ConfigMap"):
- Submit a plan — the agent first submits a change plan (Plan) listing every operation it intends to perform
- Wait for approval — the plan appears on the "Agent Change Approval" page in the Kuboard left-side menu
- You decide — review the details of each operation and choose: approve all / partially approve (check the ones you want) / reject
- Execute the change — once approved, the agent receives a one-time token and the cluster is actually modified
- View the results — execution progress is streamed in real time; you can watch every step succeed or fail
Why Do It This Way
- Controllable: every change happens under your eyes; no agent can "quietly" change anything
- Auditable: every change has a full record (which agent, when, what changed, who approved)
- Reversible: you can inspect a dry-run preview of every operation before approving, avoiding mistakes
- Partial approval: the agent proposes 10 operations; you can approve 8 and skip 2
Scope
| Operation type | Approval required |
|---|---|
| Read cluster info, query resources, view logs | No |
| Query metrics (Prometheus / metrics-server) | No |
| Create / modify / delete K8s resources | Yes |
| Restart / scale / rollback workloads | Yes |
| Pod eviction, node drain | Yes |
Approval Page Entry
After logging into Kuboard, the "Agent Change Approval" entry appears at the top of the left-side menu (path /agent-change-plans); all pending, approved, rejected, and executed plans are listed there. See the Agent Change Approval flow for the complete process.
Configuration Reference
Once configured, the mcp field in opencode.json looks like this:
{
  "mcp": {
    "kuboard": {
      "type": "remote",
      "url": "http://<kuboard-address>:9090/mcp",
      "headers": {
        "Authorization": "Bearer <key-id>.<key-secret>"
      }
    }
  }
}- Replace the host in
urlwith an address Kuboard is actually reachable at - The
Authorizationvalue is generated automatically when you copy the MCP configuration
More in this section
- Server Configuration — every MCP Server setting: master switch, transport endpoints, rate limits, CORS, Prometheus data source
- Tool Reference — names, key parameters, and purposes of all 34 MCP tools
- Approval Flow — the complete flow of a change plan from submission and approval to execution, plus the one-time token rules
- Danger Levels — tool danger levels (LOW / MEDIUM / HIGH) and the control strength at each tier
- Built-in Prompts — the preset prompt templates (diagnose Pods, generate Deployment YAML, clean up orphaned PVCs) and how they are triggered